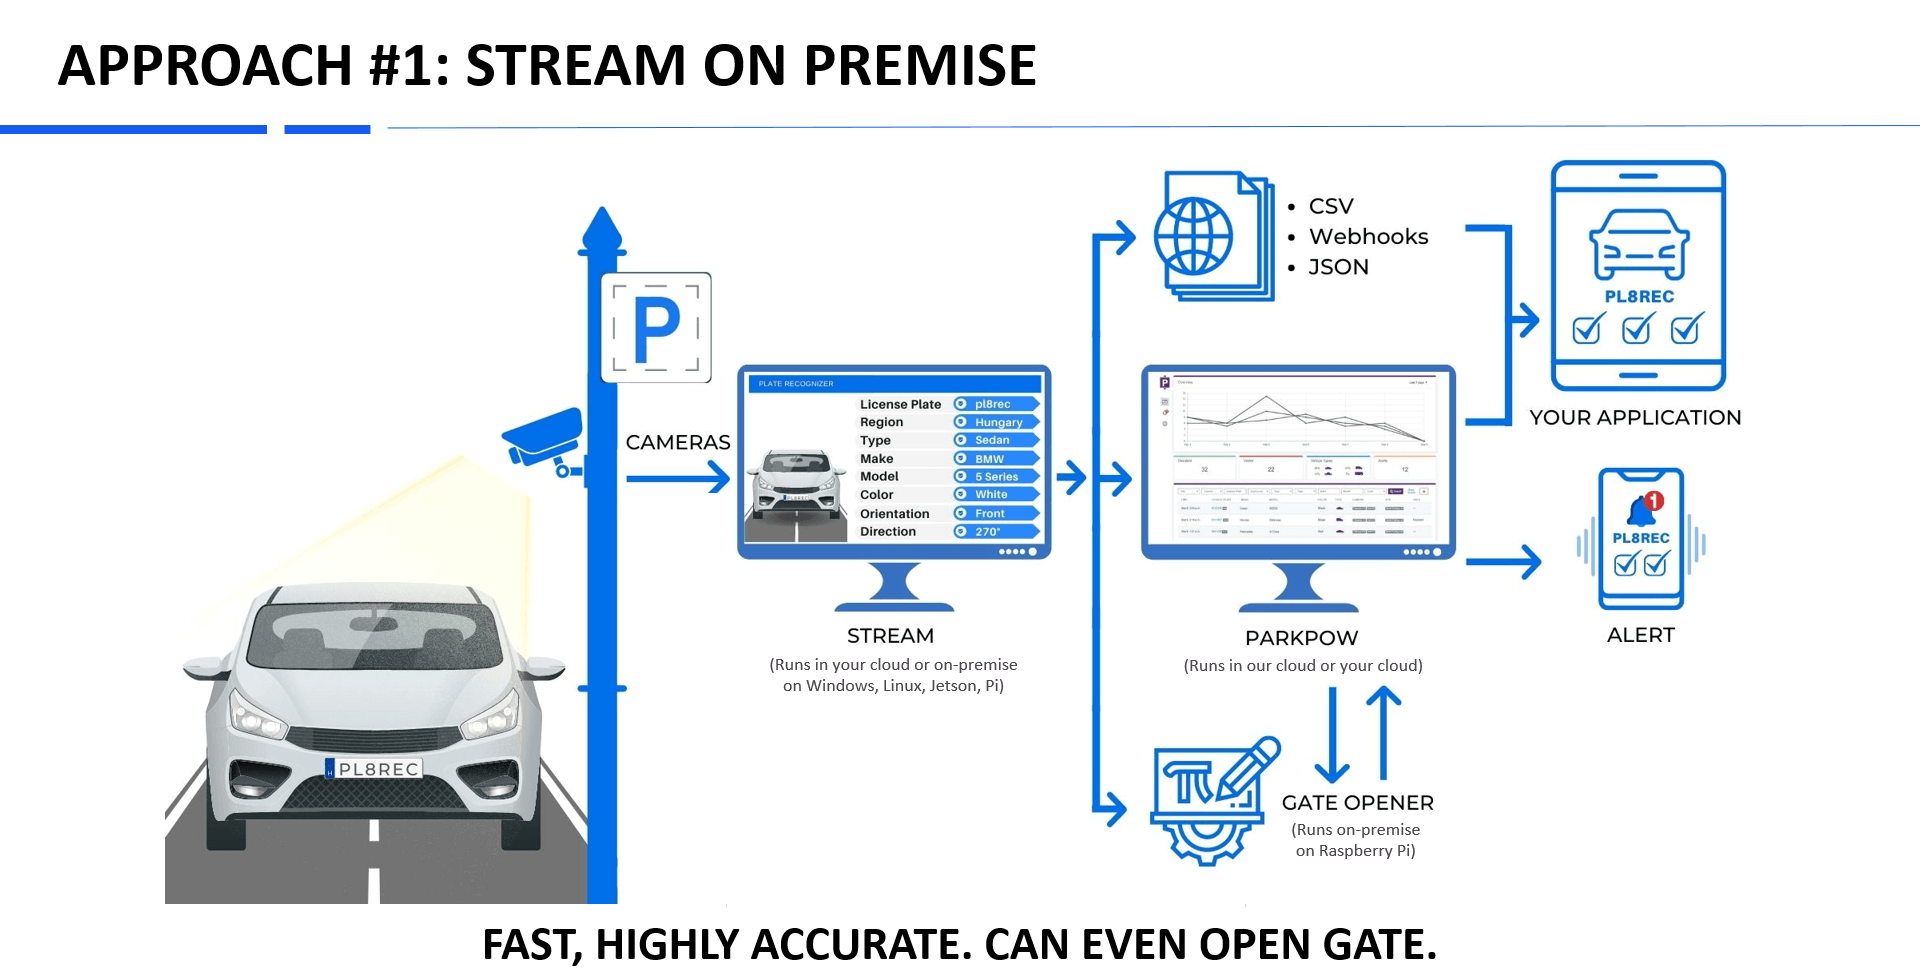
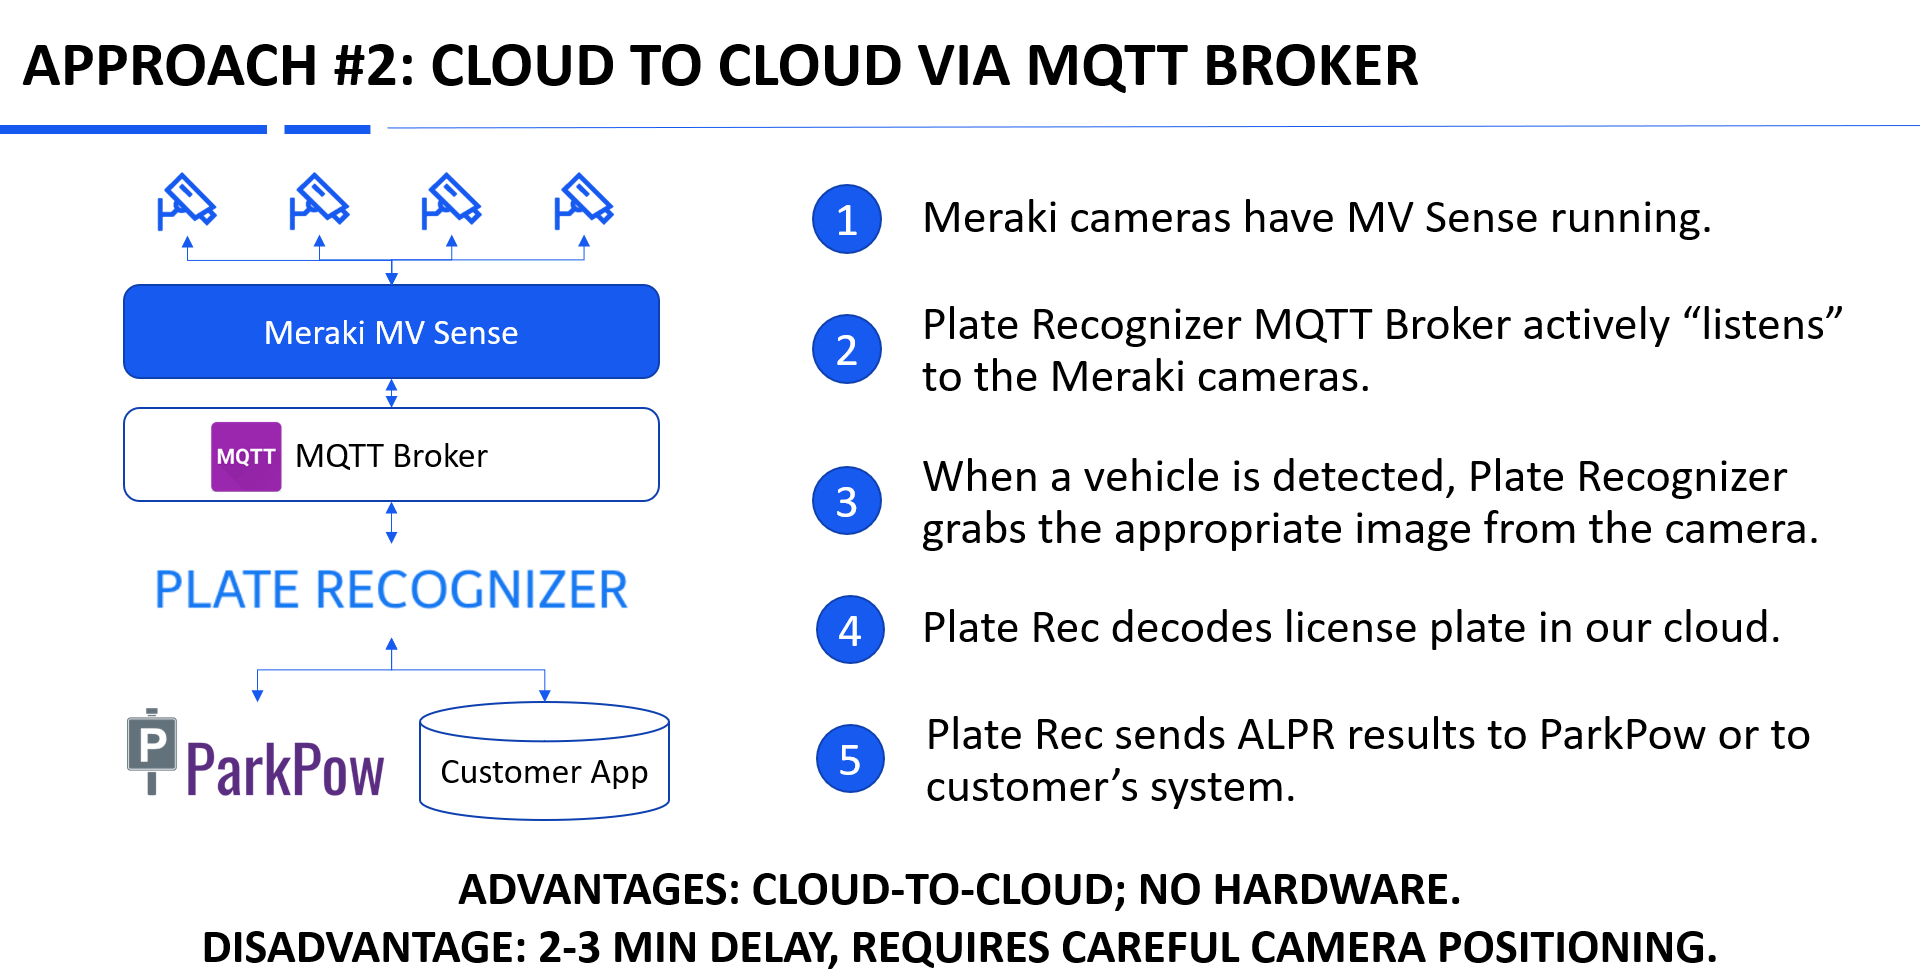
We have 2 approaches to integrate ALPR with the Meraki camera:
APPROACH 1: Stream On Premise.

APPROACH 2: Cloud-to-Cloud via MQTT Broker

Step 1.1. After you sign up on Plate Recognizer, go to app.platerecognizer.
Step 1.2. Select Integrate with camera software.
Step 1.3. Click on Request Certificate blue button.
Please wait up to 12 hours for us to approve your account. We only approve accounts with a valid business email address.
Once account is approved, you will receive an email notification with the CA Certificate.
We require a Meraki Dashboard API Key so that we can retrieve the images from your camera.
For security reasons, we recommend that you create a new admin user to manage just the cameras that require ALPR.
This way, Plate Recognizer will only have access to a specific network and cameras within that specific network. Please do NOT share your entire organization. Read Create New Organization in Meraki.
Step 2.1. Go to Organization > Configure > Administrators and click on Create Admin.
Step 3.1. Once you have done the above steps, go to app.platerecognizer.com/activate/meraki/
Step 3.2. Enter your Meraki API Key that you just created in the steps above.
Step 3.3. Enter the Country Code(s), such as us-fl for Florida or gb for the United Kingdom. Full Country Codes can be found here.
NOTE: You can configure the MQTT Broker yourself or opt for the system to do that for you automatically. Please skip to Step 5 to self-configure MQTT or read below to auto-configure.
Step 4.1. In order to auto-configure MQTT Broker, the Meraki API Key must have full access to the organiztion. To check this, go to Organizations > Configure > Administrators and click the appropriate email.
If the Organization Access shows “full”, then you can proceed with auto-configuration of the MQTT Broker.
Step 4.2. Once you have full access, go back to app.platerecognizer.com/activate/meraki/ and click Create MQTT Broker.
Step 4.3. Enter the Camera Serial Number. You can get this from Camera/My Camera/Network on the Meraki Admin page.
Once successful, you will be redirected to the Preview Meraki Camera page.
NOTE: If you successfully went through Step 4, then you can skip this section and proceed to Step 6.
Step 5.1. Log into your Meraki Dashboard online.
Step 5.2. Navigate to Cameras > Monitor > Cameras and select the camera you would like to enable MV Sense on.
Step 5.6. Enter the following information for your MQTT Broker:
Step 6.1. Test the connection between the camera and the broker to ensure communication.
After adding the MQTT Broker, the Settings page should look like the screenshot on the right.
Please note that:
Step 6.2. Go to Test Meraki Camera.
Step 6.3. Enter the Camera Serial Number. You can get this from Cameras/My Camera/Network on the Meraki Admin page.
You should see a frame from the camera feed. If you do not, then please revisit Step 2.1 and beyond.
Please note that for the MV52 camera, MV Sense object detection requires installation of MV4.16 Beta. This is captured in Cisco Meraki Case 07655357.
You’re done!
Please wait up to 1 hour and you can see results in the Plate Recognizer Dashboard.
Now, with our MQTT Integration with Meraki cameras, when a vehicle is detected by MV Sense, the image will be sent to Plate Recognizer Snapshot Cloud to decode the vehicle plate.
You can optionally use webhooks to integrate the ALPR results with your existing application or system.
Or, you can also forward the ALPR results to ParkPow for a full analytics dashboard with optional parking management features.
Stuck? Go to Help Center for immediate assistance.
Step 7.1. View the ALPR results in your Plate Recognizer Dashboard. To access the Dashboard, just sign in to your Plate Recognizer Account.
Please note that the PR Dashboard is just a simple dashboard to help you with camera placement, configuration, etc.
The best way to view the ALPR results is on ParkPow! Our sister company, ParkPow provides a full ALPR Dashboard and Parking Management solution so you can:
You can optionally use webhooks to forward the ALPR results with your existing application or system.
Step 8.1. After sign up on ParkPow with your Plate Recognizer ID.
Step 8.2. Get your ParkPow API Token.
Step 8.3. Go to Plate Recognizer Dashboard Settings.
Step 8.4. Click the slider to forward identification data to ParkPow.
Step 8.5. Enter the ParkPow API Token (from Step 7.2) and click Save.
Able to see LPR results in ParkPow? If not, then make sure to:
If you are still stuck, then Contact Us and include a screenshot of a vehicle passing through the camera.
Let us know and we’d be happy to assist.
© 2026 Plate Recognizer, a subsidiary of ParkPow, Inc. All rights reserved.
Made with ❤ from Silicon Valley & Paris.